Cleaning fuel-pump filters
The Video Course teaches you everything about modern cars.
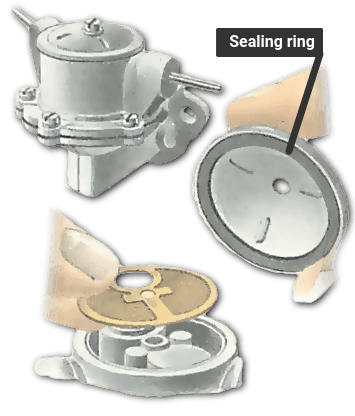
A blocked fuel-pump filter will cause the engine to cut out intermittently, particularly at high speeds, and it may stop altogether.
Not all cars have a filter in the pump . Later models often have sealed, filterless pumps which do not need maintenance, and rely on filters elsewhere, mainly in fuel pipes or the petrol tank, or at the inlet to the carburettor float chamber.
Many cars have a mechanical fuel pump driven off the camshaft . The pump should be plainly visible on one side of the engine . If not, trace the fuel pipe back from the carburettor .
If the fuel pipe leads away from the engine towards the fuel tank , you may have an electric fuel pump. Often this is at the back of the car, close to or immersed in the tank.
Disconnect the battery before servicing an electric pump - an accidental spark could ignite spilled petrol.
Clean all filters by washing them with fresh petrol. Wipe out the inside of the pump with a clean lint-free rag.
Make sure sealing gaskets are sound. Replace them if necessary. There may also be a sealing washer under the fixing screw.
Do not overtighten the screw(s) of the pump cover or it will leak and damage the pump. If the knob retaining a glass dome is overtightened, the dome may break.
Many electric pumps are SU, or copies built under licence. They are often in awkward positions, but must be removed to clean the filter.
Have two old pencils or rubber bungs handy to stop petrol gushing out of the disconnected fuel pipes.
Note which pipe is which - the same applies for electrical connections. There may be one or two, depending on whether or not the pump is earthed directly to the car body.
Filters fitted to most mechanical pumps

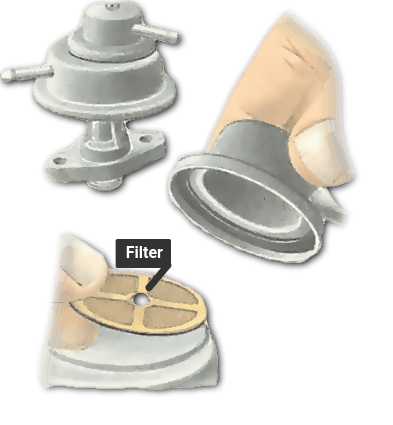
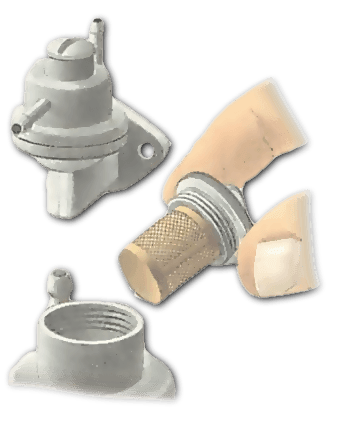
Most mechanical pumps have a removable top covering the filter. On earlier units the top may be a glass dome.
A central screw or nut holds the top on. Unscrew this, lift off the top and take out the filter. If a flexible fuel pipe is connected to the top, leave it there. This will ensure that you refit the top to the pump the right way round.
Some pumps have a cylindrical filter attached to the cover, which screws by hand into the pump.
Some may also use crimped-on pipe clips; snip off with side cutters and replace with a screw clip if the pump is removed.
SU electric pumps
The most common SU electric pump has two dome-headed right-angled 'elbow' inlet and outlet nozzles . They are made of black plastic and mounted side by side, but leading in opposite directions.
Which one does which job is marked on the casing. Remove only the inlet nozzle and work quickly, because the rubber sealing ring under it swells up when exposed to the air for a time.
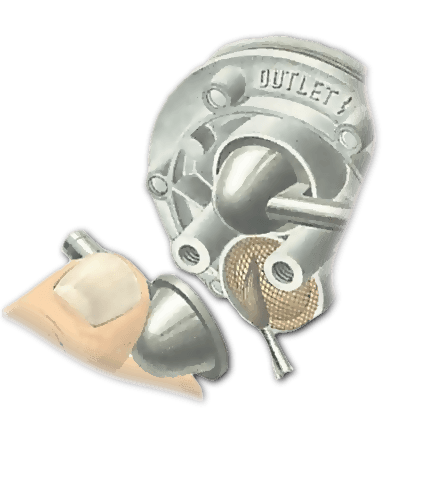
Do not remove the filter - clean it by brushing dirt away with a clean, small paintbrush and fresh petrol.
Check that there are no loose bristles in the brush . Take care to refit the nozzle the right way round.
Earlier SU pumps have screw-in connections mounted almost at right-angles to each other. The filter is under a large brass-headed cap opposite the outlet to the carburettor.
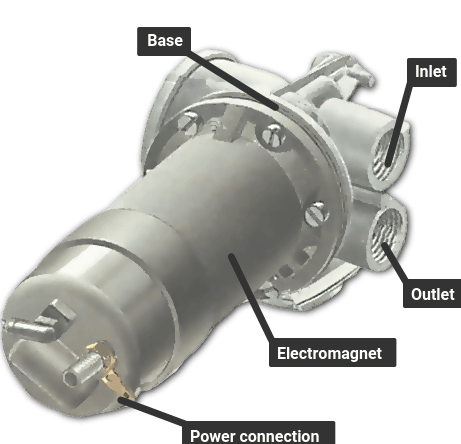
Two other SU electric pumps are found on larger cars. Both have inlet and outlet pipes side by side.
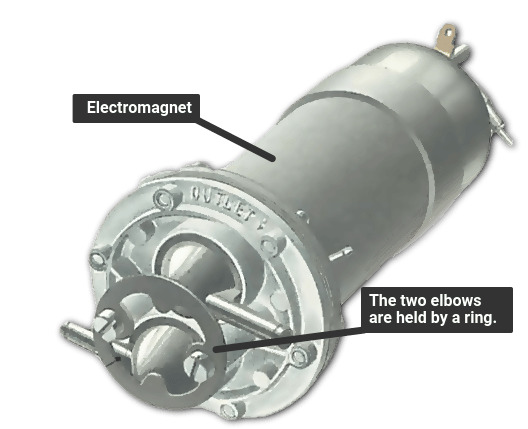
One has a double electromagnet - the large black cylindrical part.
To reach the filter on either type, you have to remove the magnet cylinder from the base.
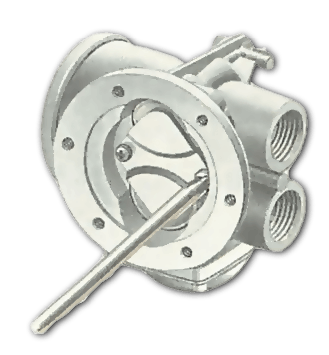
On the double type, remove only the cylinder that is positioned on the right as you view the pump, with the word 'top' moulded into the base facing you and the right way up.
Take out the six screws holding the pump together, and separate the cylinder and base.
On the base, two more screws hold a metal plate over the two valves . Unscrew them and take out the inlet-valve cover and valve - the outlet valve is marked 'out' on the outside of the base.
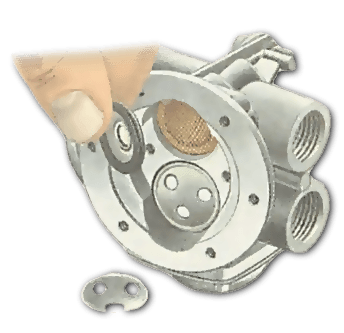
The filter, a small gauze disc between two rubber seals , is underneath. Prise it out gently with a pin.
Be sure to reassemble the pump correctly - the valve goes back with the straight strip on top. Check that the gasket between the main parts of the pump is sound, but do not turn it. It must remain in the same position for the pump to work.
Refit the pump, and the two electrical connections and reconnect the fuel pipes.
SU mechanical-pump filter
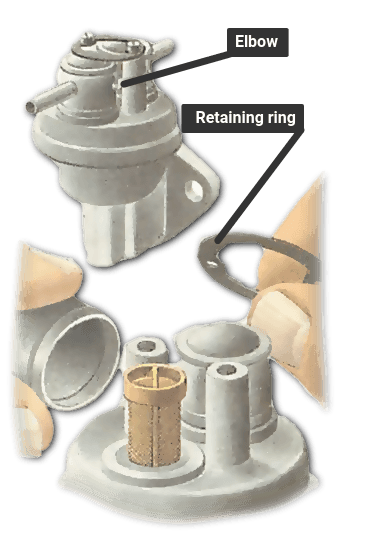
An SU mechanical pump is different from other types and is found mainly on British-built cars. There are two main SU types: AUF 800 which has a filter, and AUF 700 which does not - although its top is removable.
The 800 has inlet and outlet pipes side by side on top, leading in opposite directions. The right-angled 'elbow' connectors are held in place by a metal ring fixed by two screws. These screws are often very tightly seated, and are also made of soft metal. Use a correctly fitting screwdriver in good condition to remove them.
Remove the ring, lift off the inlet elbow only, and lift out the filter. Clean it and reassemble quickly: the rubber sealing ring under the pump elbow swells up when it is exposed to the air.
The Ultimate Car Mechanics video course
Learn everything about modern cars from our new video series.
Learn more >-
We build a Mazda MX5 Miata from scratch
We start by tearing down and then rebuilding the whole car.
-
Every part explained
There's ridiculous detail on every part. Clearly and easily explained.
-
All modeled in 3D
We've created the most detailed 3D model ever produced so we can show you everything working.


