Identifying and suppressing radio interference
The Video Course teaches you everything about modern cars.
Car radio interference originates usually in the ignition system, the charging circuit or among electrical accessories. There are several checks you can carry out to trace the source of the interference.
Interference is either radiated - that is, picked up by the aerial - or conducted to the set by its own wiring.
Before looking for the source, make sure that the set itself is properly earthed to the car's metal bodywork.
Examine the aerial mounting - it must have clean, firm contact with the underside of the bodywork to provide a satisfactory earth connection.
Some interference is fairly easy to identify. A rapid crackling, or a ticking noise, that intensifies with engine speed almost certainly is conducted, from the ignition system - the most common source of interference.
The crackling usually originates from the high-tension (HT) side and the ticking from the low-tension (LT) parts.
An alternator or dynamo not fitted with a suppressor will produce a whining sound, rising in pitch as the engine speed increases.
Interference from electrical components such as windscreen wipers, fan heater and direction indicators can be identified immediately. The noise will disappear when the component is switched off.
It is also possible to pick up interference from disc brakes . This occurs only when they are applied.
Conducted interference can be caused by the power supply cable or wiring to the speakers passing too close to the magnetic field of electrical components.
Try re-routing the cable or speaker wiring as a preliminary step. If that solves the problem, secure the wires in their new position with plastic clips or wide adhesive tape.
The car's metal body acts as a screen between the aerial and the ignition and charging systems, so keep the bonnet closed whenever you listen to check interference.
Suppression of interference is most difficult in cars with glass-fibre bodies, which have no screening effect.
On cars with glass-fibre bodywork, as well as fitting suppressors and earth-bonding straps to various components, you may have to line the underside of the bonnet with metal foil or a conductive graphite paint.
Fitting an aerial
The position of the aerial mast and the route of the lead greatly help to achieve interference-free reception.
Fix the aerial as far away from the engine as possible. If it has to be near the engine, find a position farthest from the ignition system. If you are in doubt, consult a specialist radio fitter.
Do not run the aerial lead through the engine compartment. It will almost certainly attract interference. Similarly, keep it well away from any wiring and electrical accessories.
But also keep the lead short, so that it collects as few electrical emissions as possible. If in doubt about the routing, consult a radio fitter.
An aerial hole is usually 3/4in - 7/8in. (19-22 mm). (See Drilling holes in car bodywork ).
Check that the aerial is properly earthed. Tune your radio into a weak station and grasp the aerial firmly while standing outside the car. If the radio becomes louder, the earthing may be faulty.
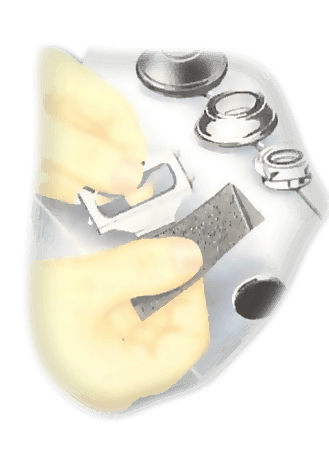
To rectify, dismantle the mounting which usually has serrations or spikes penetrating the car body. Clean the metal with abrasive paper at the points of contact. Reassemble and tighten.
Suppressing a generator
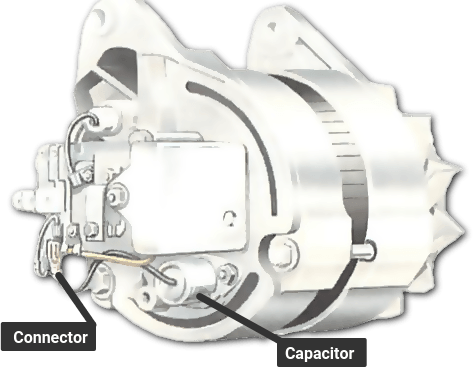
The generator (dynamo ar alternator ) can be suppressed by fitting a 1-3 Micro Farad (mfd) capacitor for a dynamo or a 3 mfd capacitor for an alternator.
Connect the capacitor lead to the output terminal of the dynamo or alternator. With an alternator, remove the rear cover to reach the terminal. Follow the manufacturers recommendations carefully, as the device is easily damaged.

Slacken the nearest generator securing bolt and clean the area with emery cloth to ensure a good earth. Slip the capacitor forked mounting tag under the bolt, and retighten.
If interference from the charging circuit continues, attach an earth-bonding strap between the generator casing and the chassis .
Fitting a suppressor to the coil

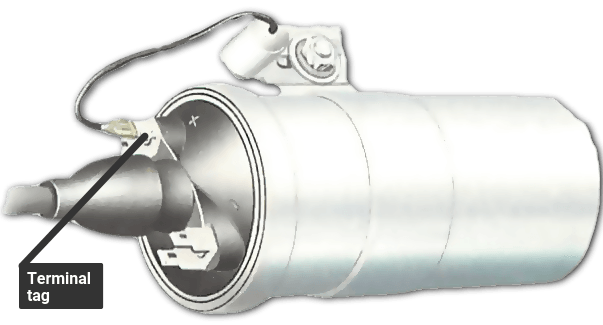
The basic suppressor for the ignition system is a 1 mfd suppressor. Attach it to the LT or positive (+) terminal of the coil on the ignition switch side.
There are two types of suppressor connected in different ways, depending on whether your set has AM or FM reception.
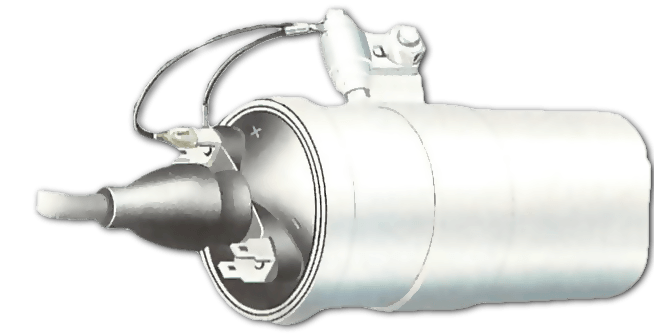
For an AM set, use a parallel capacitor with a single lead. For an FM set, a twin-lead type with the second lead earthed may help.
If the trouble persists, try a 3 mfd capacitor for the AM set or a 2.5 mfd for the FM set.
Finally, fasten an earth-bonding strap between the coil and chassis. All interference from the LT side of the ignition system should be eliminated.
Curing HT interference

The violent crackling of HT interference is more difficult to cure. First, check that the set and aerial are both properly earthed.
Examine the condition of ignition components such as the plugs, points and, in particular, the HT leads, and sparkplug caps. Defective HT leads and plug connectors will create interference.
Modern carbon-cored leads have built-in suppression. Renew them if they are damaged or stretched.
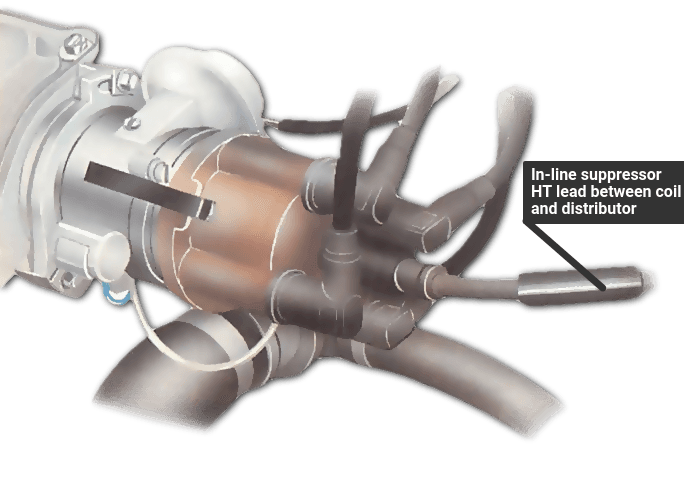
The copper-cored type - which many radio enthusiasts prefer should have a suppressor built into the sparkplug cap.
Check that the distributor has a coil-lead suppressor. Usually it is just above the sprung carbon brush in the cap. Most cars have this basic suppressor built into the distributor. If necessary, check with the manufacturer's local agent.
If your distributor does not have a suppressor, fit a 5K Ohm or 10K Ohm resistor in the coil lead.
There are two types of resistor - an in-line type which you connect to the middle of the HT lead, or a plug-in type which you push into the centre coil-lead socket in the distributor cap .
If the interference continues, fit a similar suppressor to each plug lead.
Take care that the combined resistance of HT suppressors in the coil lead, distributor, plug leads and plug caps does not exceed 25K Ohm. Otherwise, ignition power could be reduced.
Suppressing electric motors

Every electric motor in the car generates its own magnetic field , which can radiate interference unless it is suppressed.
When first installed, each motor is normally earthed through its mounting. With age, however mounting deteriorate, and flakes of paint or rust can act as an insulator between the mounting and car body.
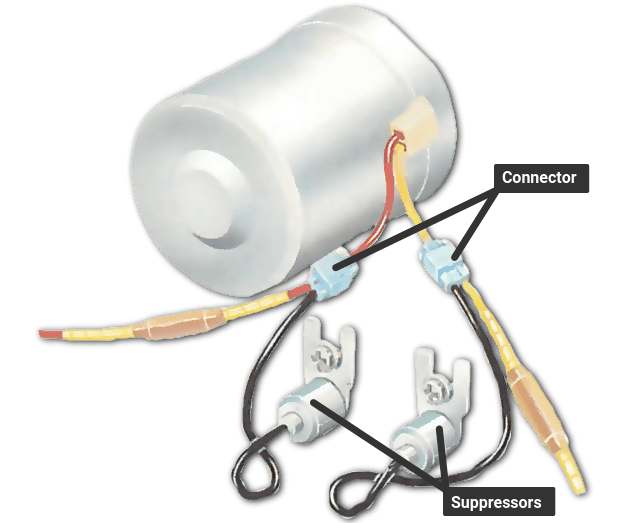
There are two ways to suppress interference from motors. First, try fitting an earth-bonding strap between the motor casing and the bodywork. Use a length of copper braiding, or a piece of heavy-gauge wire.
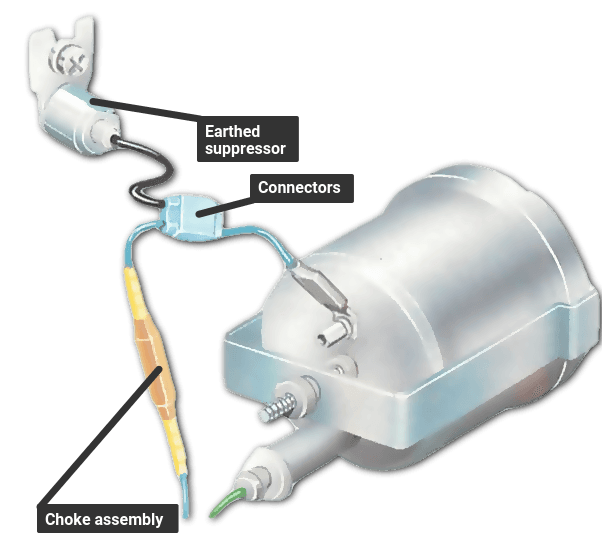
Scrape the points of contact to the bare metal to ensure good electrical connections, and secure the screw fixings tightly.
If interference persists, connect a suppressor - 1 mfd or 2 mfd capacitor - between the motor feed wire and earth. This method is sustainable for both AM and FM radios.
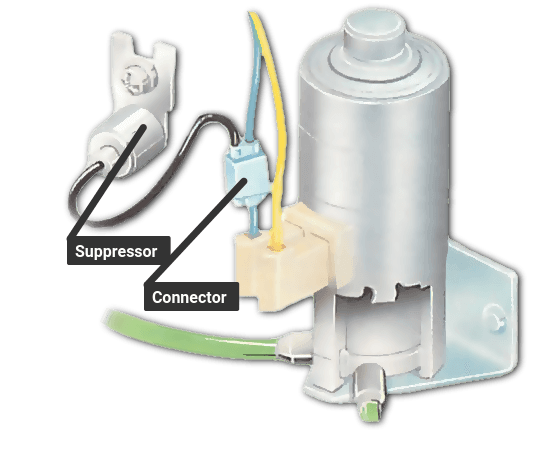
If an electric motor continues to cause interference despite the fitting of suppressors, use power supply chokes, available from car-accessory stores, in the connecting wires.
Finding other sources of interference
Interference can also be radiated by a metal part of the car insulated from the main body .
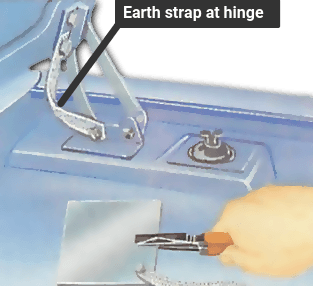
The bonnet and boot lid, bumpers, rear axle and suspension units are among possible sources.
Some electronic devices may also cause interference. The more that are fitted or added, the greater the chance that one is interfering with another, producing a humming background noise.
There are two ways to locate the source, both requiring special devices.
For an AM radio, use an aerial extension lead with a metal rod attached. Plug the lead into the set, start the engine and turn on the radio. Do not open the bonnet.
Probe underneath and all around the car with the metal rod to find where the interference is strongest. Earth that part to the body with a bonding strap.
For an FM radio, use a metal plate with a long earth lead bolted to it. Secure the other end of the lead tightly to bare chassis metal under a convenient nut or bolt. Start the engine and turn on the radio. Do not open the bonnet.
Hold the plate with a pair of insulated pliers and move it underneath and all around the car. The plate acts as an interference reflector.
The Ultimate Car Mechanics video course
Learn everything about modern cars from our new video series.
Learn more >-
We build a Mazda MX5 Miata from scratch
We start by tearing down and then rebuilding the whole car.
-
Every part explained
There's ridiculous detail on every part. Clearly and easily explained.
-
All modeled in 3D
We've created the most detailed 3D model ever produced so we can show you everything working.


