Adjusting catches and hinges
The Video Course teaches you everything about modern cars.
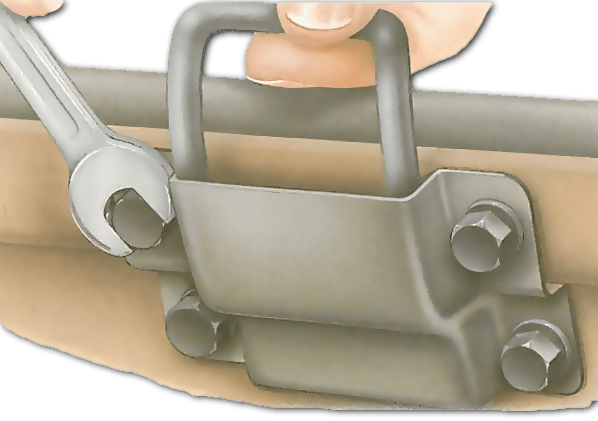
Doors or bonnet and boot lids that do not close properly may have moved out of alignment and need adjustment to the hinges or catch.
Many hinges are welded to the bodywork and cannot be adjusted, but worn hinge pins can be changed (See Renewing hinge pins and hinges ). Bolted hinges can usually be adjusted.
Catch adjustment is mostly to the striker plate rather than the door or lid lock that fits into the plate.
Most hinges and striker plates have space around them to allow for movement up, down or sideways.
Adjustments to doors
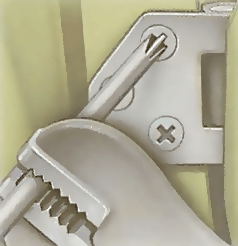
To adjust the door hinge bolts, you may need to loosen the door-lock striker assembly and remove a panel on the door pillar.
Bolts may have hexagon or cross-slot heads. They will be very tight; loosen them with a socket and bar, a large screwdriver and self-locking grips or an impact driver.
Leave one bolt tight enough to hold the hinge. Close the door gently, easing it up and down until you get a good fit.
Align the door against bodywork moulding lines or trim strips. Open the door, taking care to hold it in the new position.
Tighten the bolts. Re-check the door movement and then adjust the striker plate.
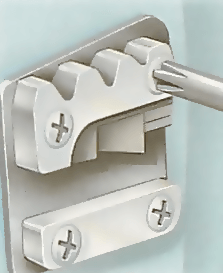
To adjust the striker plate, open the door and mark on the door pillar with a pencil the height at which the lock passes it.
Use this mark to judge whether the striker plate needs to be slightly raised or lowered to give the door a close fit. The lock striker should enter the slot on the plate centrally without rubbing the sides.
If it does not, loosen the striker plate and raise or lower it as necessary.
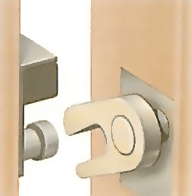
To adjust a claw-and-pin catch, place some Plasticine on the striker pin and shut the door. Open it, and the impression will show whether the claw on the door lock grips the pin in the centre.
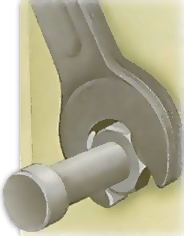
If it does not, loosen the striker pin and move it as necessary, then retighten it.
Some pins are held by a hexagon nut, some are turned with an Allen key. Others may have a cross-slot head that can be turned with a heavy screwdriver and self-locking grips or with an impact driver.
Adjusting bonnet catches and locks
Cars with front-hinged bonnets often have a horizontal striker that hooks into a plate with a hook-retracting spring on the bulkhead.
Lift the bonnet lid slightly to see whether the striker makes contact with the centre of the plate.
If it does not, check the bonnet alignment and adjust the hinges if necessary.
Otherwise loosen the bolts securing the striker-plate and adjust the plate until the striker makes a clean entry.
Tighten the bolts and re-check the shutting action.
Most rear-hinged bonnets have a lock with a dovetail bolt that can be adjusted. On some cars, however, it is the striker plate that has to be adjusted.
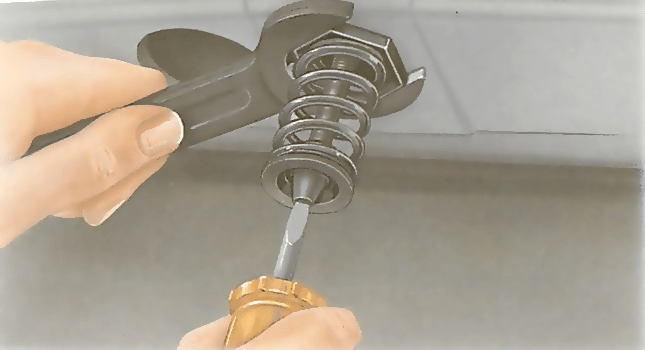
To adjust the dovetail bolt, open the lid and loosen the nut securing the bolt.
Partially close the lid and slip a hand through the gap. Move the bolt until it aligns with the centre of the striker plate. Open the lid and retighten the nut.
Most dovetail locks can also be adjusted in or out to hold the bonnet lid tightly shut.
Loosen the nut and turn the bolt using a screwdriver in the slot at the bolt end.
Turn clockwise for a tighter fit, anticlockwise for a looser fit.
Tighten the nut and re-check the shutting action.
Adjusting bonnet and boot hinges
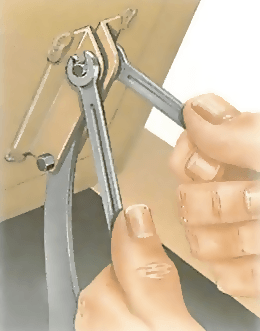
Some bonnet and boot hinges are welded or bolted to the lid by an anchor plate.
Before adjusting a bonnet hinge, slacked the dovetail bolt on the bonnet lock. Before adjusting a boot hinge, loosen the striker plate of the lock.
Loosen the hinge nuts, leaving one tight enough to hold the lid. Close the lid and ease it into a tight shutting position.
Keep the lid in the new position as you open it to tighten the hinge nuts. Check the shutting position and readjust the hinges as necessary.
The Ultimate Car Mechanics video course
Learn everything about modern cars from our new video series.
Learn more >-
We build a Mazda MX5 Miata from scratch
We start by tearing down and then rebuilding the whole car.
-
Every part explained
There's ridiculous detail on every part. Clearly and easily explained.
-
All modeled in 3D
We've created the most detailed 3D model ever produced so we can show you everything working.


