Replacing core plugs
The Video Course teaches you everything about modern cars.
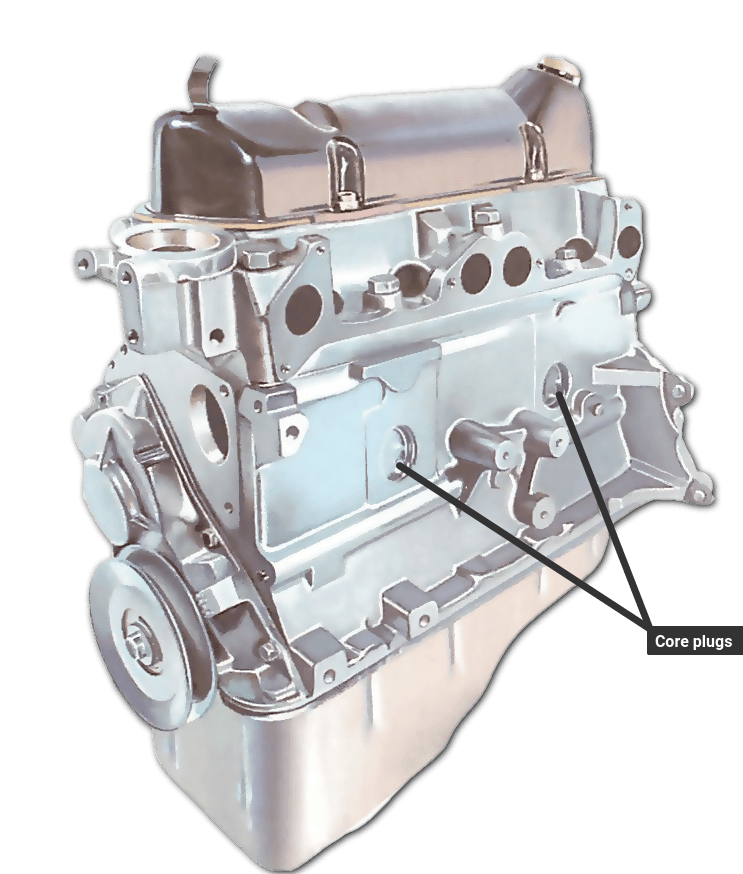
Core plugs are also known as expansion plugs, welch plugs and sealing discs - a point to remember when buying one.
The plugs are set in various places around the engine block and cylinder head .
Their purpose is to seal holes left in the block and head when those components were cast.
They also provide weak points which can give way under the pressure of expanding coolant if the engine freezes or overheats. They could possibly prevent frozen coolant cracking the casting.
Typical plug sites are in the side of the block under a manifold ; at the back, inside or above the clutch housing - awkwardly near the bulkhead; and in the top of the cylinder head, often hidden under an overhead camshaft .
Plugs can blow out completely, resulting in a sudden loss of coolant. They can also leak slowly through rust holes or around the edge. A slow leak usually leaves a stain down the block. Look all over the engine for such a mark.
Some of the plugs are difficult to find - use a mirror to look in hidden spots - such as the back of the block, next to the bulkhead. An engine may also use more than one size of plug, so measure the hole when buying a replacement.
Access is the next problem. You may have to disconnect the carburettor .
Plugs facing the bulkhead may be unreachable without lifting out the engine, so you may have to have the job done at a garage.
Do not cut a hole in the bulkhead. It is load-bearing and, unless you weld a plate back over the hole, weakening it might invalidate your insurance. Riveting the plate on will not suffice.
Disconnect the battery and drain the engine block, saving the coolant if you want to reuse it (See How to flush an engine radiator ).
Catch the coolant in a clean container, and filter it through muslin before pouring it back. Check the strength of the solution (See Checking and topping up car antifreeze coolant ).
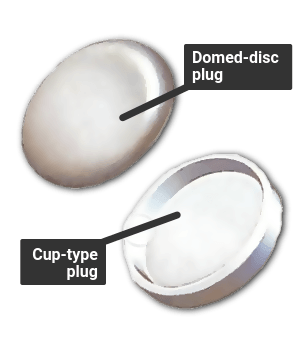
There are two common types of core plug, the cap type and the domed-disc type, which are inserted in different ways.
Removing a core plug
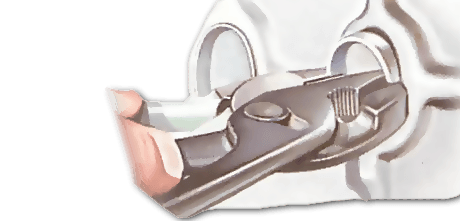
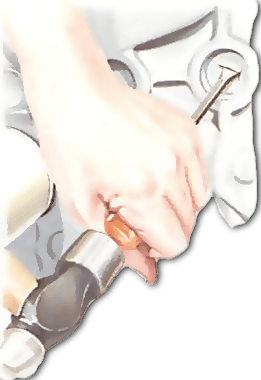
With either type of plug, the usual way of removing it is to carefully drive a small screwdriver blade through the middle of the plug and prise it out.
Take care to pull out a cup-type plug straight, or it may jam.
The edges of a cup plug may project far enough for you to pull it out with two pairs of pliers. Grip the edges firmly and pull with an even amount of force on both pairs of pliers. Do not lever against the block — you may damage the plug seating.
Scrape the remains of the old sealant from the hole with a piece of wood.
Replacing a core plug
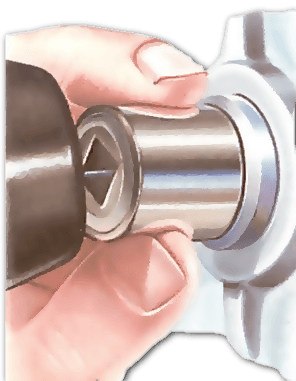
Smear the mating surfaces of both plug and hole with gasket sealant.
Insert a disc-type plug with the domed side outwards. Make sure it rests squarely on the shoulder inside the hole. Tap it in the middle with a flat-headed punch to expand it. It must be a firm fit .
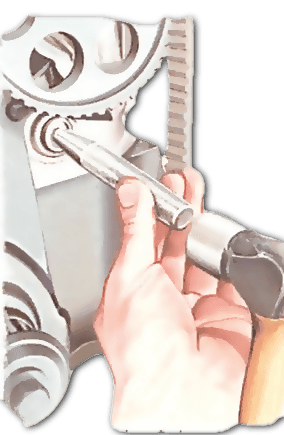
For a cup-type plug, find a socket which fits snugly inside the cup. Hold the cup absolutely square and flat against the hole, and drive it home by tapping the socket with a soft-faced hammer.
Do not let the plug get crooked, and leave a little of the rim protruding in case you have to remove the plug later.
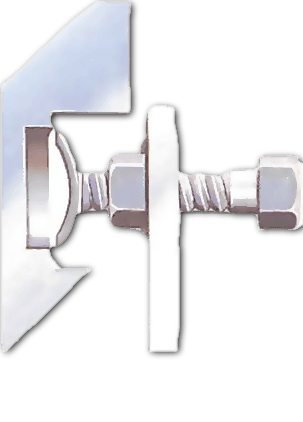
There may not be room to swing a hammer. For example, the Leyland 'B'-type engine has a disc plug just in front of the bulkhead and masked by the engine backplate. But there is a hole in the backplate facing the plug.
Insert the new plug, put a 2 in. (50 mm) bolt through the hole in the backplate, and fit a washer and nut to it on the other side. Screw up the bolt to press the plug firmly home.
The Ultimate Car Mechanics video course
Learn everything about modern cars from our new video series.
Learn more >-
We build a Mazda MX5 Miata from scratch
We start by tearing down and then rebuilding the whole car.
-
Every part explained
There's ridiculous detail on every part. Clearly and easily explained.
-
All modeled in 3D
We've created the most detailed 3D model ever produced so we can show you everything working.


