How to replace windscreen wipers
The Video Course teaches you everything about modern cars.
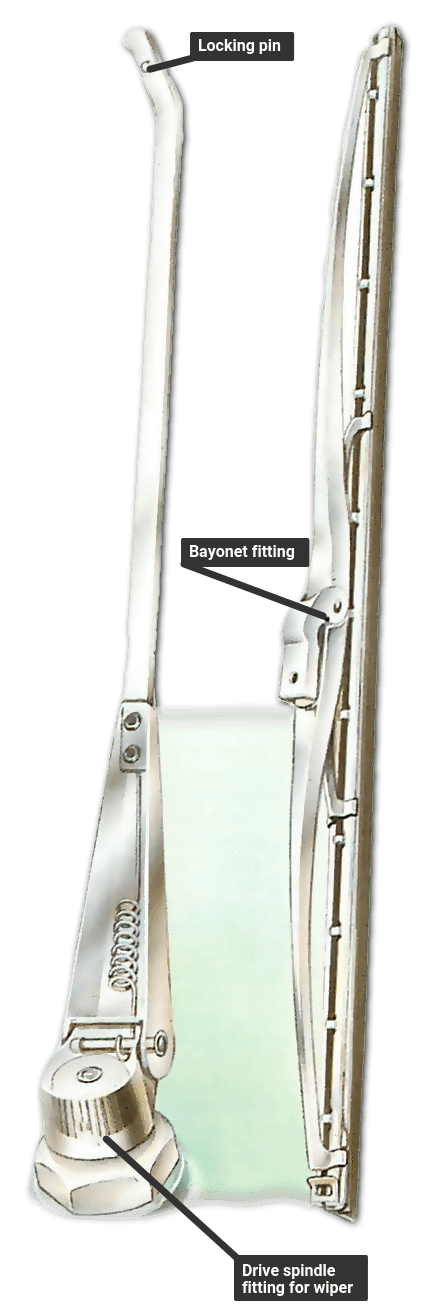
Wiper blades are fitted bayonet-style to the end of the arm, or the end of the arm is hooked or has a side locking pin. If you renew just the rubber part, be sure to get the right one and follow the maker's instructions.
Wiper arms are fixed to their drive spindles by a clip, fixing nut or a screw. Usually the spindle is splined and the arm mounting cap is serrated.
When renewing wiper arms ensure that the new arm is fitted in exactly the same place as the old one was, so that it parks in the same position.
Do not fit the arm so that the blade parks against the windscreen surround - the blade will hit the rubber, accelerating wear and making a lot of unnecessary noise.
Adjusting the wipers
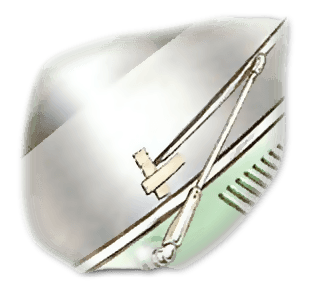
Before you start, make sure the blades are correctly parked and mark the position of the tip of each blade on the windscreen with a small piece of masking tape.
When the new arm and its blade are fitted, the blade tip should be in the same position on the windscreen.
If it is not, remove the arm again and realign, moving it one serration at a time on the spindle.
Replacing wiper blades
Bayonet type
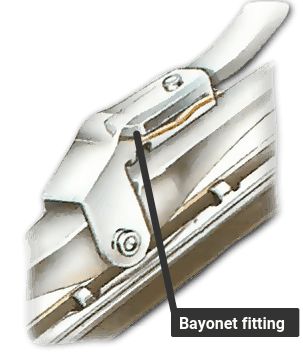
The blade is a push fit on the end of the arm, which has a small raised pin that engages a hole in the blade mounting.
Disconnect by pressing the blade against spring pressure until the pin is disengaged. Some blades have a locking clip which must be moved to one side. The new blade simply pushes in.
Hooked arms
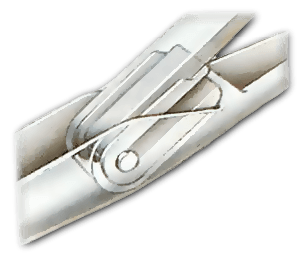
The blade carries a U-shaped plastic piece pivoted on a pin. The plastic fits inside the hooked end of the arm. To remove the blade, squeeze the ends of the U-shape together and move the blade down the arm to the open end of the hook; disconnect the U-piece from the hook.
When fitting the new blade, thread the hooked arm through an aperture above the U-piece. Insert the U-section into the hook until a locking piece of plastic engages a cutout or notch in the hook.
Sidelock blades
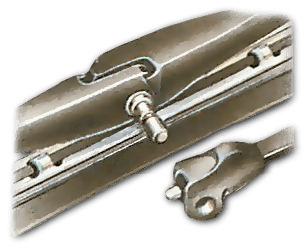
Sidelock blades have a waisted pin on one side which engages in a transverse hole at the end of the arm. Press the locking clip away from the pin and withdraw the pin sideways.
To insert a new blade, simply push the pin into the hole - but make sure the blade is above the arm. It can be fitted the wrong way round.
Some hook-ended arms are converted to take sidelock blades by inserting shaped plastic locking pieces into the hook.
To remove the blade, press the plastic insert towards the open end of the hook by bearing on the piece that overlaps it. Spread apart the two halves of the insert to release the blade. To fit the new blade, enclose the pin in the two halves of the insert and slide the assembly into the hook until it locks.
Pantograph type
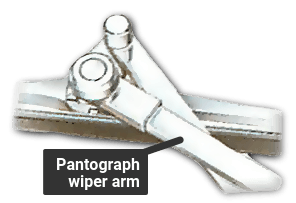
Some cars use a double pantograph arm. The blade will be fixed to two pivots, usually by locknuts. Unscrew or prise off any covers, and release the nuts to detach the blades.
Adjusting wiper arms
Arms held by clips
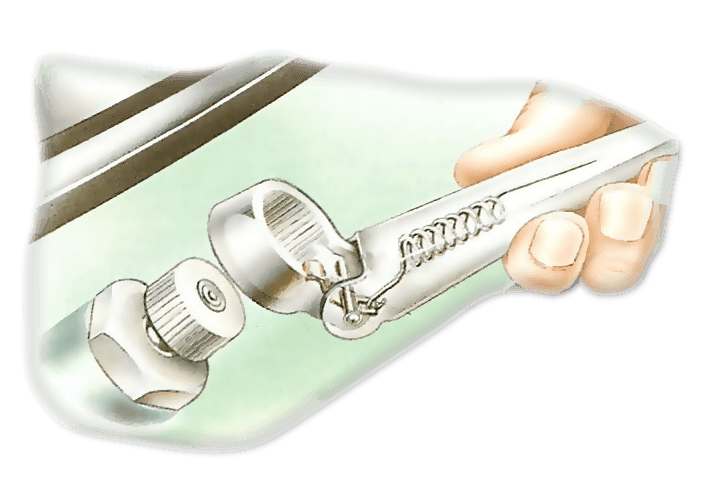
The clip is fitted behind the arm, and bears on the spindle near the hinge pin. Once you can see the clip, use a screwdriver blade to prise it away from the spindle, and pull the arm off.
Fit the new arm with a blade attached to it, so that you can see that it is in the correct position. Push it partway on at first, and check the position. If it is correct, push the arm on the spindle the rest of the way until the clip snaps into place.
Arms held by a nut or a screw
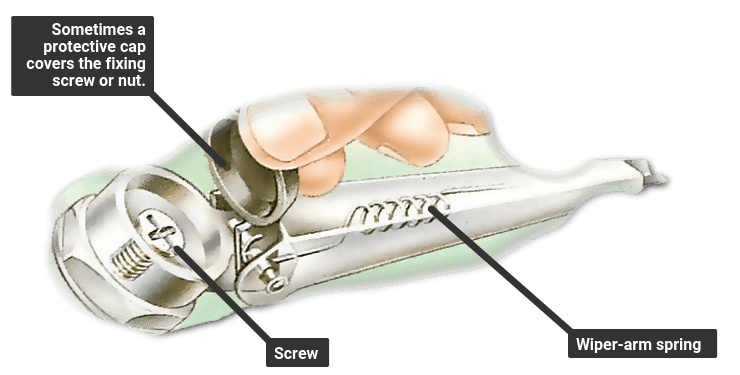
A screw at the spindle end of the arm is used instead of a clip in some systems. Remove the screw and pull the arm off the spindle.
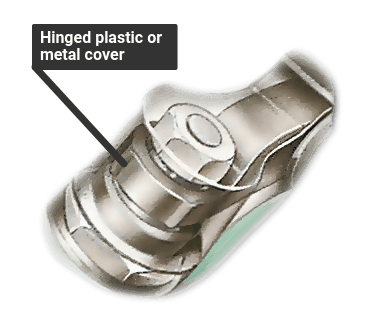
Fixing nuts are not always so obvious, because car makers protect them with a hinged metal or plastic cover or a cap. Caps usually have a recess in the edge - use a screwdriver blade to prise them off.
The Ultimate Car Mechanics video course
Learn everything about modern cars from our new video series.
Learn more >-
We build a Mazda MX5 Miata from scratch
We start by tearing down and then rebuilding the whole car.
-
Every part explained
There's ridiculous detail on every part. Clearly and easily explained.
-
All modeled in 3D
We've created the most detailed 3D model ever produced so we can show you everything working.


